Working with Watermills
This lesson focuses on how watermills generate power. Student teams design and build a working watermill out of everyday materials and test their design in a basin. Student watermills must be able to sustain three minutes of rotation.
- Learn about engineering design.
- Learn about planning and construction.
- Learn about teamwork and working in groups.
Age Levels: 8-18
Build Materials (For each team)
Required Materials (Trading/Table of Possibilities)
- Styrofoam cylinder
- Plastic or wooden spoons
- Small wooden (balsa) pieces
- Bendable wire (such as pipe cleaners, florist or craft wire)
- String or yarn
- Paperclips (large and small)
- Rubber bands
- Toothpicks
- Aluminum foil
- Wooden dowels
- Plastic or wax coated food container lids
Testing Materials
- Water source
- Large basin or sink
- Measuring cup or container for pouring water

Materials
- Water source
- Large basin or sink
- Measuring cup or container for pouring water
Process
Test each team’s watermill design by placing the design on a bin filled with water. Pour water over the watermill for 3 minutes. Students should document how many times their watermill rotated during the 3 minutes and what condition their design was in after the testing.
Design Challenge
You are a team of engineers who have been given the challenge to design your own watermill out of everyday materials. Your wheel will need to rotate in water for three minutes without falling apart.
Criteria
- Wheel must rotate in water for 3 minutes without falling apart.
- All the materials will be exposed to water.
Constraints
- Use only the materials provided.
- Teams may trade unlimited materials.
- Break class into teams of 2-4.
- Hand out the Working with Watermills worksheet, as well as some sheets of paper for sketching designs.
- Discuss the topics in the Background Concepts Section. Consider asking students if they know how a watermill works. Have they seen any watermills near their home?
- Review the Engineering Design Process, Design Challenge, Criteria, Constraints and Materials.
- Instruct students to start brainstorming and sketching their designs.
- Provide each team with their materials.
- Explain that students must develop a watermill out of the provided materials that will rotate in water for 3 minutes without falling apart. Remind students that all of the materials they use will be exposed to water.
- Announce the amount of time they have to design and build (1 hour recommended).
- Use a timer or an on-line stopwatch (count down feature) to ensure you keep on time. (www.online-stopwatch.com/full-screen-stopwatch). Give students regular “time checks” so they stay on task. If they are struggling, ask questions that will lead them to a solution quicker.
- Students meet and develop a plan for their watermill. They agree on materials they will need, write/draw their plan, and present their plan to the class. Teams may trade unlimited materials with other teams to develop their ideal parts list.
- Teams build their designs.
- Test the watermill designs by placing the design in a basin of water and pouring water over the watermill for 3 minutes.
- Teams should document how many times their watermill rotated during the 3 minutes and the condition of their watermill after the testing.
- As a class, discuss the student reflection questions.
- For more content on the topic, see the “Digging Deeper” section.
Variation for Older Students
Consider having older students create a gear system to lift an object using the energy from the wheel. This can be executed with spools of thread glued to the end of a stick, with rubber bands and perhaps string. Challenge students to lift a weight using the water power.
Student Reflection (engineering notebook)
- Did you succeed in creating a watermill that operated for three minutes? If not, why did it fail?
- Did you decide to revise your original design or request additional materials while in the construction phase? Why?
- Did you negotiate any material trades with other teams? How did that process work for you?
- If you could have had access to materials that were different than those provided, what would your team have requested? Why?
- Do you think that engineers have to adapt their original plans during the construction of systems or products? Why might they?
- If you had to do it all over again, how would your planned design change? Why?
- What designs or methods did you see other teams try that you thought worked well?
- Do you think you would have been able to complete this project easier if you were working alone? Explain…
- What drawbacks does the watermill have as a reliable source of power?
- What advantages does the watermill have as a renewable source of power?
Time Modification
The lesson can be done in as little as 1 class period for older students. However, to help students from feeling rushed and to ensure student success (especially for younger students), split the lesson into two periods giving students more time to brainstorm, test ideas and finalize their design. Conduct the testing and debrief in the next class period.
Watermills through History
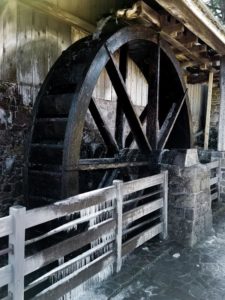
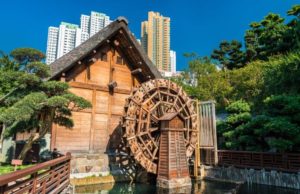
A watermill is a structure that uses a water wheel or turbine to drive a mechanical process such as ground flour or lumber production, or metal shaping (rolling, grinding or wire drawing). A watermill that generates electricity is frequently called a hydroelectric plant. The ancient Greeks and Romans are thought to be the first to used water to power their mills. In the early 1st century BC, the Greek epigrammatist Antipater of Thessalonica referenced a waterwheel which was effectively used to grind grain and reduce human work. The Romans built some of the first watermills outside of Greece for grinding flour and spread the technology for constructing watermills throughout the Mediterranean.
How Does it Work?
A watermill works by diverting water from a river or pond to a water wheel, usually along a channel or pipe. The water’s force drives or pushes the blades of the wheel (or turbine) which then turns or rotates an axle that drives whatever machinery is attached to it. After turning the waterwheel, the water exits the watermill. Sometimes mills are stacked along a waterway so that water passes through multiple mills turning many wheels.
Horizontal or Vertical?
Watermills that use water wheels with a horizontal wheel and vertical shaft are sometimes called “Greek Mills.” A “Roman Mill” refers to a watermill that uses a vertical wheel (on a horizontal shaft). Greek style mills are the older and simpler of the two designs, but they require high water velocity to work well. The Roman style mills are much more complicated in their component parts and require gears to transfer the power from a shaft with a horizontal axis to one with a vertical axis.
- Axle: A central shaft for a rotating wheel or gear
- Constraints: Limitations with material, time, size of team, etc.
- Criteria: Conditions that the design must satisfy like its overall size, etc.
- Engineers: Inventors and problem-solvers of the world. Twenty-five major specialties are recognized in engineering (see infographic).
- Engineering Design Process: Process engineers use to solve problems.
- Engineering Habits of Mind (EHM): Six unique ways that engineers think.
- Force: A push or pull.
- Hydroelectric Plant: A watermill that generates electricity.
- Iteration: Test & redesign is one iteration. Repeat (multiple iterations).
- Prototype: A working model of the solution to be tested.
- Turbine: Blades of the wheel.
- Velocity: The rate of change in an object’s position
- Watermill: A structure that uses a water wheel or turbine to drive a mechanical process such as ground flour or lumber production, or metal shaping (rolling, grinding or wire drawing).
Internet Connections
Waterwheel Factory
U.S. Geological Survey Hydroelectric Power
Society for the Preservation of Old Mills
Recommended Reading
Cathedral, Forge and Waterwheel: Technology and Invention in the Middle Ages (ISBN: 0060925817)
Windmills and Waterwheels Explained (ISBN: 1846740118)
Writing Activity
Write an essay or a paragraph about how engineering has helped reduce human work over the ages.
Alignment to Curriculum Frameworks
Note: Lesson plans in this series are aligned to one or more of the following sets of standards:
- U.S. Science Education Standards (http://www.nap.edu/catalog.php?record_id=4962)
- U.S. Next Generation Science Standards (http://www.nextgenscience.org/)
- International Technology Education Association’s Standards for Technological Literacy (http://www.iteea.org/TAA/PDFs/xstnd.pdf)
- U.S. National Council of Teachers of Mathematics’ Principles and Standards for School Mathematics (http://www.nctm.org/standards/content.aspx?id=16909)
- U.S. Common Core State Standards for Mathematics (http://www.corestandards.org/Math)
- Computer Science Teachers Association K-12 Computer Science Standards (http://csta.acm.org/Curriculum/sub/K12Standards.html)
National Science Education Standards Grades K-4 (ages 4 – 9)
CONTENT STANDARD A: Science as Inquiry
As a result of activities, all students should develop
- Abilities necessary to do scientific inquiry
CONTENT STANDARD B: Physical Science
As a result of the activities, all students should develop an understanding of
- Position and motion of objects
CONTENT STANDARD E: Science and Technology
As a result of activities, all students should develop
- Abilities of technological design
CONTENT STANDARD F: Science in Personal and Social Perspectives
As a result of activities, all students should develop understanding of
- Science and technology in local challenges
CONTENT STANDARD G: History and Nature of Science
As a result of activities, all students should develop understanding of
- Science as a human endeavor
National Science Education Standards Grades 5-8 (ages 10 – 14)
CONTENT STANDARD A: Science as Inquiry
As a result of activities, all students should develop
- Abilities necessary to do scientific inquiry
CONTENT STANDARD B: Physical Science
As a result of their activities, all students should develop an understanding of
- Motions and forces
- Transfer of energy
CONTENT STANDARD E: Science and Technology
As a result of activities in grades 5-8, all students should develop
- Abilities of technological design
CONTENT STANDARD F: Science in Personal and Social Perspectives
As a result of activities, all students should develop understanding of
- Science and technology in society
National Science Education Standards Grades 9-12 (ages 14-18)
CONTENT STANDARD A: Science as Inquiry
As a result of activities, all students should develop
- Abilities necessary to do scientific inquiry
CONTENT STANDARD B: Physical Science
As a result of their activities, all students should develop understanding of
- Motions and forces
- Interactions of energy and matter
CONTENT STANDARD E: Science and Technology
As a result of activities, all students should develop
- Abilities of technological design
CONTENT STANDARD F: Science in Personal and Social Perspectives
As a result of activities, all students should develop understanding of
- Natural resources
- Science and technology in local, national, and global challenges
CONTENT STANDARD G: History and Nature of Science
As a result of activities, all students should develop understanding of
- Historical perspectives
Next Generation Science Standards Grades 3-5 (Ages 8-11)
Motion and Stability: Forces and Interactions
Students who demonstrate understanding can:
- 3-PS2-1. Plan and conduct an investigation to provide evidence of the effects of balanced and unbalanced forces on the motion of an object.
Energy
- 4-PS3-4. Apply scientific ideas to design, test, and refine a device that converts energy from one form to another.
Earth and Human Activity
Students who demonstrate understanding can:
- 4-ESS3-1. Obtain and combine information to describe that energy and fuels are derived from natural resources and their uses affect the environment.
Engineering Design
Students who demonstrate understanding can:
- 3-5-ETS1-1.Define a simple design problem reflecting a need or a want that includes specified criteria for success and constraints on materials, time, or cost.
- 3-5-ETS1-2.Generate and compare multiple possible solutions to a problem based on how well each is likely to meet the criteria and constraints of the problem.
- 3-5-ETS1-3.Plan and carry out fair tests in which variables are controlled and failure points are considered to identify aspects of a model or prototype that can be improved.
Next Generation Science Standards Grades 6-8 (Ages 11-14)
Engineering Design
Students who demonstrate understanding can:
- MS-ETS1-1 Define the criteria and constraints of a design problem with sufficient precision to ensure a successful solution, taking into account relevant scientific principles and potential impacts on people and the natural environment that may limit possible solutions.
- MS-ETS1-2 Evaluate competing design solutions using a systematic process to determine how well they meet the criteria and constraints of the problem.
Next Generation Science Standards Grades 9-12 (Ages 14-18)
Energy
Students who demonstrate understanding can:
- HS-PS3-3. Design, build, and refine a device that works within given constraints to convert one form of energy into another form of energy.
Standards for Technological Literacy – All Ages
The Nature of Technology
- Standard 2: Students will develop an understanding of the core concepts of technology.
- Standard 3: Students will develop an understanding of the relationships among technologies and the connections between technology and other fields of study.
Technology and Society
- Standard 4: Students will develop an understanding of the cultural, social, economic, and political effects of technology.
- Standard 5: Students will develop an understanding of the effects of technology on the environment.
Design
- Standard 9: Students will develop an understanding of engineering design.
- Standard 10: Students will develop an understanding of the role of troubleshooting, research and development, invention and innovation, and experimentation in problem solving.
Abilities for a Technological World
- Standard 11: Students will develop abilities to apply the design process.
- Standard 13: Students will develop abilities to assess the impact of products and systems.
The Designed World
- Standard 16: Students will develop an understanding of and be able to select and use energy and power technologies.
- Standard 20: Students will develop an understanding of and be able to select and use construction technologies.

 Industrial Engineering
 Computer Engineering
Design Your Own Watermill
You are a team of engineers who have been given the challenge to design your own watermill out of everyday items. Your wheel will need to be able to withstand a three minute water test.
Planning Stage
Meet as a team and discuss the problem you need to solve. Then develop and agree on a design for your watermill. You’ll need to determine what materials you want to use — keep in mind that all your parts will be exposed to water. Draw your design in the box below, and be sure to indicate the description and number of parts you plan to use. Present your design to the class. You may choose to revise your teams’ plan after you receive feedback from class.
|
Materials Needed:
|
Construction Phase
Build your watermill. During construction you may decide you need additional materials or that your design needs to change. This is ok — just make a new sketch and revise your materials list.
Testing Phase
Each team will test their watermill in a classroom basin. You’ll need to time your test to make sure your watermill can operate for three minutes without falling apart. Be sure to watch the tests of the other teams and observe how their different designs worked.
Evaluation Phase
Evaluate your teams’ results, complete the evaluation worksheet, and present your findings to the class.
Use this worksheet to evaluate your team’s results in the Engineered Music lesson:
1. Did you succeed in creating a watermill that operated for three minutes? If not, why did it fail?
2. Did you decide to revise your original design or request additional materials while in the construction phase? Why?
3. Did you negotiate any material trades with other teams? How did that process work for you?
4. If you could have had access to materials that were different than those provided, what would your team have requested? Why?
5. Do you think that engineers have to adapt their original plans during the construction of systems or products? Why might they?
6. If you had to do it all over again, how would your planned design change? Why?
7. What designs or methods did you see other teams try that you thought worked well?
8. Do you think you would have been able to complete this project easier if you were working alone? Explain…
9. What drawbacks does the watermill have as a reliable source of power?
10. What advantages does the watermill have as a renewable source of power?
Downloadable Student Certificate of Completion