Hull Engineering
This lesson focuses on how the shape of ship’s hull can impact its speed and stability potential in water. Teams of students design their own ship’s hull on paper, and build it using everyday materials. Teams review all hull designs, predict which will go farthest, and then test their design on water using a pull meter or rubber band for propulsion.
- Learn about engineering design.
- Learn about ship design and engineering.
- Learn about teamwork and working in groups.
Age Levels: 11-18
Build Materials (For each team)
Required Materials
- Equal-sized blocks of hard Styrofoam
- Cutting tools (i.e. child’s scissors, plastic knives)
- Duct tape or other tape to eliminate water absorption
- Optional decorating materials:
- Stickers
- Colored construction paper
- Aluminum foil
- Toothpicks

Testing Materials
- Long waterproof container such as a window box planter or gutter section with end pieces attached
- Propulsion system:
- Rubber bands
- Cardboard
- Fasteners
- Measuring Tape
Testing Materials
- Long waterproof container such as a window box planter or gutter section with end pieces attached
- Water
- Propulsion system:
- Rubber bands
- Cardboard
- Binder clips/fasteners
- Measuring tape
Process

Set up the waterway prior to the lesson (only one is needed for all testing). Add water to a trough or sealed gutter section and tape either a push-pull measuring tape or similar set-up to one end. Mark the length of the waterway with the measuring tape or other marks to indicate how far a boat travels. Testing should be done by the teacher to ensure consistency.
Before testing, have each team write a name on their hulls to identify them during testing. Test each boat with different levels of propulsion, pulling the rubber band back to 3”, 6″, and 8″ to see how the hull functions at different levels. Students record the results of each test, noting distance spanned and stability.
Design Challenge
You are a team of engineers who have been given the challenge of developing a new hull design for a ship that will be tested to determine which will go the farthest while remaining stable on the water.
Criteria
- Must remain stable on the water and not flip over, while moving as far as it can across the water.
- Hull design can be any shape.
Constraints
- Use only the materials provided.
- Break class into teams of 2-3.
- Hand out the Hull Engineering worksheet, as well as some sheets of paper for sketching designs.
- Discuss the topics in the Background Concepts Section.
- Review the Engineering Design Process, Design Challenge, Criteria, Constraints and Materials.
- Provide each team with their materials.
- Explain that students must develop a new hull design for a ship that will be tested to determine which will go the farthest while remaining stable on the water.
- Announce the amount of time they have to design and build (1 hour recommended).
- Use a timer or an on-line stopwatch (count down feature) to ensure you keep on time. (www.online-stopwatch.com/full-screen-stopwatch). Give students regular “time checks” so they stay on task. If they are struggling, ask questions that will lead them to a solution quicker.
- Students meet and develop a plan for their hull. They agree on materials they will need, write/draw their plan, and present their plan to the class. Tell them to be sure to include detailed measurements in their plan so that they can make precise cuts.
Teams should make a prediction for the distance their hull will travel. They may also make predictions for the distance other team’s hulls will travel, for comparison. (The prediction process may be assigned as homework to reduce in-school time required for the lesson.) - Teams build their designs by cutting the Styrofoam block to match their design specifications. They should write a name on their hulls to identify them during testing. (Safety note: plastic knives will work on hard Styrofoam; supervision may be required for safety purposes or teachers may serve as the manufacturing facility and complete the cutting to the teams’ specifications.)
- Set up the waterway prior to the lesson (only one is needed for all testing). Add water to a trough or sealed gutter section and tape either a push-pull measuring tape or similar set-up to one end. Mark the length of the waterway with the measuring tape or other marks to indicate how far a boat travels. Testing should be done by the teacher to ensure consistency.
Before testing, have each team write a name on their hulls to identify them during testing. Test each boat with different levels of propulsion, pulling the rubber band back to 3”, 6″, and 8″ to see how the hull functions at different levels. Students record the results of each test, noting distance spanned and stability. - Teams should document the distance their hull traveled and compare it to their prediction. If they have also made predictions on the distance other teams’ hulls would travel, they should document their speeds and compare.
- As a class, discuss the student reflection questions.
- For more content on the topic, see the “Digging Deeper” section.
Student Reflection (engineering notebook)
- How did your hull design perform compared to other teams in your classroom?
- What do you think was the aspect of the design of the hull that performed the best?
- If you had to do it all over again, how would your planned design change? Why?
- Do you think that engineers have to adapt their original plans during the manufacturing process? Why might they?
- What designs or methods did you see other teams try that you thought worked well on either a performance or aesthetic level? What appealed to you?
- Did you find that there were many designs in your classroom that met the project goal? What does this tell you about engineering plans.
- Explain how teamwork impacted your team’s performance on this project.
- How many products can you think of that would benefit from prototype testing?
Time Modification
The lesson can be done in as little as 1 class period for older students. However, to help students from feeling rushed and to ensure student success (especially for younger students), split the lesson into two periods giving students more time to brainstorm, test ideas and finalize their design. Conduct the testing and debrief in the next class period.
Naval Architecture and Marine Engineering
What do Marine Engineers and Naval Architects Do?
Marine engineers and naval architects are involved in the design, construction, and maintenance of ships, boats, and related equipment. They design and supervise the construction of everything from aircraft carriers to submarines, and from speedboats to tankers. Naval architects work on the basic design of ships, including hull form and stability. Marine engineers work on the propulsion, steering, and other systems of ships. Marine engineers and naval architects apply knowledge from a range of fields to the entire design and production process of all water vehicles.
Type of Vessels
There are a wide range of vessels that are designed and tested by marine engineers and naval architects including:
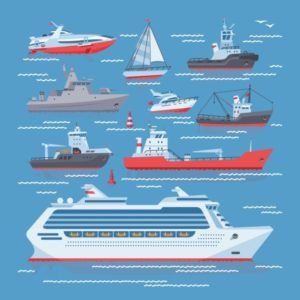
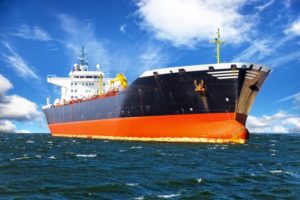
- Merchant Ships – oil/gas tankers, cargo ships, bulk carrier, container ships
- Passenger/vehicle ferries, cruise ships
- Warships – frigates, destroyers, aircraft carriers, amphibious ships, etc.
- Submarines and underwater vehicles Icebreakers
- Offshore drilling platforms, semisubmersibles
- High Speed Craft – hovercraft, multi-hull ships, hydrofoil craft, etc.
- Workboats – fishing boat, platform supply vessel, tug boat, pilot vessels, rescue craft, etc.
- Yachts, power boats, and other recreational craft.
How Important is Testing?
Scientists and engineers use testing systems to evaluate the performance of equipment of all types before construction. Testing can take a variety of forms including wind tunnels, computer simulation, model making, and prototype fabrication. frame. They have a higher average speed than do single or monohull sailing ships.
Hull Shapes
Monohull
A monohull is a type of boat having only one hull. It is the most prevalent form of waterborne vessel. Monohull boats frequently ride deeply in the water.
Submarines
All small modern submarines and submersibles, as well as the oldest ones, have a single hull. However, for large submarines, the approaches have separated. All Soviet heavy submarines are built with a double hull structure, but American submarines usually are single-hulled. The double hull of a submarine is different from a ship’s double hull. The external hull, which actually forms the shape of submarine, is called outer hull or light hull.
Catamaran

A catamaran is a type of boat or ship consisting of two hulls joined by a frame. Catamarans can be sail- or enginepowered. The catamaran was the invention of the paravas, a fishing community in the southern coast of Tamil Nadu, India. Catamarans were used by the ancient Tamil Chola dynasty as early as the 5th century AD for moving their fleets to conquer such Southeast Asian regions as Burma, Indonesia and Malaysia.
Trimaran
A trimaran is a multihull boat consisting of a main hull (vaka) and two smaller outrigger hulls (amas), attached to the main hull with lateral struts (akas). The design and names for the trimaran components are derived from the original proa constructed by native Pacific Islanders. The first trimarans were built by indigenous Polynesians almost 4,000 years ago, and much of the current terminology is inherited from them.
Coracle

A coracle is a small, lightweight boat used mainly in Wales and in parts of Western and South Western England but also found across many parts of the British Isles. Oval in shape and very similar to half a walnut shell, the structure is made of a framework of split and interwoven willow rods, tied with willow bark. The structure has a keel-less, flat bottom to evenly spread the weight of the boat and its load across the structure and to reduce the required depth of water – often to only a few inches, making it ideal for use on rivers.
Internet Connections
Recommended Reading
- Ship Construction for Marine Students (ISBN: 0713671785)
- Ships and Science: The Birth of Naval Architecture in the Scientific Revolution, 1600-1800 (ISBN: 0262062593)
- Introduction to Naval Architecture (ISBN: 0750665548)
Writing Activity
Computer modeling has become an integral part of engineering design over the past twenty years. Suggest some possible reasons for the popularity of this tool and how modeling on a computer benefits engineering design.
Alignment to Curriculum Frameworks
Note: Lesson plans in this series are aligned to one or more of the following sets of standards:
- U.S. Science Education Standards (http://www.nap.edu/catalog.php?record_id=4962)
- U.S. Next Generation Science Standards (http://www.nextgenscience.org/)
- International Technology Education Association’s Standards for Technological Literacy (http://www.iteea.org/TAA/PDFs/xstnd.pdf)
- U.S. National Council of Teachers of Mathematics’ Principles and Standards for School Mathematics (http://www.nctm.org/standards/content.aspx?id=16909)
- U.S. Common Core State Standards for Mathematics (http://www.corestandards.org/Math)
- Computer Science Teachers Association K-12 Computer Science Standards (http://csta.acm.org/Curriculum/sub/K12Standards.html)
National Science Education Standards Grades 5-8 (ages 10 – 14)
CONTENT STANDARD A: Science as Inquiry
As a result of activities, all students should develop
- Abilities necessary to do scientific inquiry
- Understandings about scientific inquiry
CONTENT STANDARD B: Physical Science
As a result of their activities, all students should develop an understanding of
- Motions and forces
- Transfer of energy
CONTENT STANDARD E: Science and Technology
As a result of activities in grades 5-8, all students should develop
- Abilities of technological design
- Understandings about science and technology
CONTENT STANDARD F: Science in Personal and Social Perspectives
As a result of activities, all students should develop understanding of
- Science and technology in society
CONTENT STANDARD G: History and Nature of Science
As a result of activities, all students should develop understanding of
- Science as a human endeavor
National Science Education Standards Grades 9-12 (ages 14-18)
CONTENT STANDARD A: Science as Inquiry
As a result of activities, all students should develop
- Abilities necessary to do scientific inquiry
- Understandings about scientific inquiry
CONTENT STANDARD B: Physical Science
As a result of their activities, all students should develop understanding of
- Motions and forces
- Interactions of energy and matter
CONTENT STANDARD E: Science and Technology
As a result of activities, all students should develop
- Abilities of technological design
- Understandings about science and technology
National Science Education Standards Grades 9-12 (ages 14-18)
CONTENT STANDARD F: Science in Personal and Social Perspectives
As a result of activities, all students should develop understanding of
- Science and technology in local, national, and global challenges
CONTENT STANDARD G: History and Nature of Science
As a result of activities, all students should develop understanding of
- Science as a human endeavor
Next Generation Science Standards Grades 3-5 (Ages 8-11)
Motion and Stability: Forces and Interactions
Students who demonstrate understanding can:
- 3-PS2-1. Plan and conduct an investigation to provide evidence of the effects of balanced and unbalanced forces on the motion of an object.
Engineering Design
Students who demonstrate understanding can:
- 3-5-ETS1-1.Define a simple design problem reflecting a need or a want that includes specified criteria for success and constraints on materials, time, or cost.
- 3-5-ETS1-2.Generate and compare multiple possible solutions to a problem based on how well each is likely to meet the criteria and constraints of the problem.
- 3-5-ETS1-3.Plan and carry out fair tests in which variables are controlled and failure points are considered to identify aspects of a model or prototype that can be improved.
Next Generation Science Standards Grades 6-8 (Ages 11-14)
Engineering Design
Students who demonstrate understanding can:
- MS-ETS1-2 Evaluate competing design solutions using a systematic process to determine how well they meet the criteria and constraints of the problem.
Standards for Technological Literacy – All Ages
The Nature of Technology
- Standard 1: Students will develop an understanding of the characteristics and scope of technology.
- Standard 2: Students will develop an understanding of the core concepts of technology.
- Standard 3: Students will develop an understanding of the relationships among technologies and the connections between technology and other fields of study.
Technology and Society
- Standard 4: Students will develop an understanding of the cultural, social, economic, and political effects of technology.
- Standard 7: Students will develop an understanding of the influence of technology on history.
Standards for Technological Literacy – All Ages
Design
- Standard 8: Students will develop an understanding of the attributes of design.
- Standard 9: Students will develop an understanding of engineering design.
- Standard 10: Students will develop an understanding of the role of troubleshooting, research and development, invention and innovation, and experimentation in problem solving.
Abilities for a Technological World
- Standard 11: Students will develop abilities to apply the design process.
The Designed World
- Standard 18: Students will develop an understanding of and be able to select and use transportation technologies.

 Industrial Engineering
 Computer Engineering
You are a team of engineers who have been given the challenge of developing a new hull design for a ship that will be tested to determine which will go the farthest while remaining stable on the water.
Research/Preparation Phase
- Review the various Student Reference Sheets.
Planning as a Team
- Your team has been provided with a block of foam and other materials.
- Start by meeting with your team and devising a design for your ship hull. Your hull will need to be stable and not flip over in the water when moved, and your goal is to have your hull design move further than any of the others developed in your classroom. You can make your hull any shape you like however.
- Write or draw a cross section of your plan in the box below, and be sure to include detailed measurements so that when you execute the plan (build the hull out of foam) you are very precise about where cuts should be made in your block. Mark the grid below with your own measurements so your design is clear.
|
|
|||||||||||||||
|
|
|||||||||||||||
|
|
|||||||||||||||
|
|
|||||||||||||||
|
|
|||||||||||||||
|
|
|||||||||||||||
|
|
|||||||||||||||
|
|
|||||||||||||||
|
|
|||||||||||||||
|
|
|||||||||||||||
|
|
|||||||||||||||
|
|
Construction Phase
- Carve your hull design out of the block of hard foam you have been provided. Be especially careful of sharp edges. You may have been provided with additional materials such as duct tape or other materials to decorate your ship. If so, this is the time to include these items.
Competitive Analysis Phase
- Take a good look at all the hulls created by other “engineering” teams in your classroom. Notice the differences, and as a team, make predictions of the distance you think the competition with achieve at the different propulsion levels of the testing device. Later, you’ll use this sheet to mark down the actual results after testing.
| Your team’s prediction | Team: | Team: | Team: | Team: | Team: | Team: |
| Distance at Level 3
|
||||||
| Distance at Level 6
|
||||||
| Distance at Level 8
|
||||||
| Will it capsize? |
Hull Testing
- Observe as your team and other teams test their prototypes in your classroom waterway. Record your team’s results in the box below, including points and observations.
|
Actual Results
|
Team: | Team: | Team: | Team: | Team: | Team: |
| Distance at Level 3
|
||||||
| Distance at Level 6
|
||||||
| Distance at Level 8
|
||||||
| Did it capsize? |
Reflection
- How did your hull design perform compared to other teams in your classroom?
- What do you think was the aspect of the design of the hull that perform the best?
- If you had to do it all over again, how would your planned design change? Why?
- Do you think that engineers have to adapt their original plans during the manufacturing process? Why might they?
Downloadable Student Certificate of Completion