Flashlights and Batteries
This lesson explores how a flashlight works, showing the electric circuit and switch functions of this everyday household item. Students learn how batteries work, how they provide power to the simple circuit within a simple flashlight, and how the switch controls the flow of electrons. Students work in teams to disassemble a flashlight, and draw a schematic of a flashlight’s circuit design.
- Learn how switches control the flow of electricity.
- Learn to draw basic electric schematic diagrams.
- Learn how the electric circuit and battery within a flashlight operates.
- Learn about teamwork and working in groups.
Age Levels: 8-11
Build Materials
Required Materials
- Flashlight
- 2 D Batteries
- 2 Switches
Design Challenge
You are a team of engineers who have been given the challenge of disassembling and reassembling a flashlight, so that it operates. Then, you’ll design and draw a schematic for an improved flashlight (new materials, multiple bulbs, extra batteries) and share your design with the class.
- Break class into teams of 3-4.
- Hand out the Flashlights and Batteries worksheet, as well as some sheets of paper for sketching designs.
- Discuss the topics in the Background Concepts Section. Show students a working flashlight and explain how the switch on the flashlight controls the flow of electricity throughout the flashlight circuit.
- Provide each team with their materials.
- Ask the teams to disassemble and reassemble the flashlight, so that it operates.
- Ask teams to draw an electric circuit schematic for a flashlight in the “on” position.
- Student teams next design an improved flashlight, and draw another electronic schematic for their new design. (Ideas: new materials, multiple bulbs, extra batteries)
- Teams present their new design to the class.
- For more content on the topic, see the “Digging Deeper” section.
Time Modification
The lesson can be done in as little as 1 class period for older students. However, to help students from feeling rushed and to ensure student success (especially for younger students), split the lesson into two periods giving students more time to brainstorm, test ideas and finalize their design. Conduct the testing and debrief in the next class period.
What is a Simple Circuit?
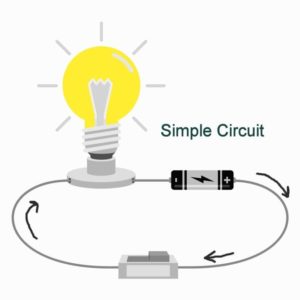
Simple Circuit
A simple circuit consists of three minimum elements that are required to complete a functioning electric circuit: a source of electricity (battery), a path or conductor on which electricity flows (wire) and an electrical resistor (lamp) which is any device that requires electricity to operate. The illustration below shows a simple circuit containing, one battery, two wires, a switch, and a bulb. The flow of electricity is from the high potential (+) terminal of the battery through the bulb (lighting it up), and back to the negative (-) terminal, in a continual flow when the switch is in the on position so the current can flow.
Schematic Diagram of a Simple Circuit
The following is a schematic diagram of the simple circuit showing the electronic symbols for the battery, switch, and bulb.
Simulating a Switch
Simulating a Switch by Disconnecting a Wire or Adding a Pencil
There are several ways you can simulate a switch in a simple circuit. Simply removing and replacing the wire from the bulb can serve as a switch. Another simple switch can be made by attaching the end of one of the wires to the eraser end of a pencil using a rubber band. Then attach another rubber band to the other end of the pencil, and by simply laying the other end on top of – and then off of – the connecting wire, you have created a switch. Other types of conductors can also be used in switch design, such as aluminum foil, hair clips, paperclips, paper fasteners, and some metal pens.
Batteries and Flashlights
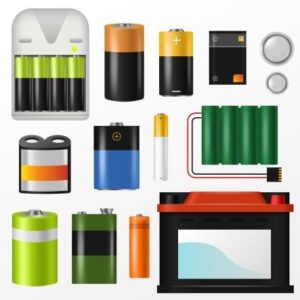
Battery History
The first battery was demonstrated in 1800 by Count Alessandro Volta. His experiments showed that different metals in contact with each other could create electricity. He constructed a stack of discs of zinc alternating with blotting paper soaked in saltwater and silver or copper. When wires made of two different metals were attached to both the top and bottom discs, Volta was able to measure a voltage and a current. He also discovered that the higher the pile, the higher the voltage. The current is produced because of a chemical reaction arising from the different electron-attracting capabilities of the two metals. Additional information on battery history may be found on the Engineering and Technology History Wiki (https://ethw.org/Batteries).
Flashlight History
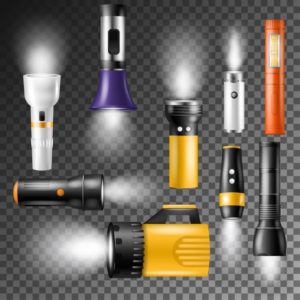
In the 1890s, American Ever-Ready Company founder Conrad Hubert invented the electric hand torch. Hubert acquired the patent for the first Eveready flashlight in 1898. Hubert’s first flashlights were made from paper and fiber tubes, with a bulb and a brass reflector. At the time, batteries were very weak and bulbs were still developing, so the first flashlights produced only a brief “flash” of light – which gave the invention its name.
How Flashlights Work
There are seven main components to a flashlight:
- Case or Tube: holds all the other components of the flashlight.
- Contacts: thin spring or strip of metal usually made of copper or brass that serves as the connection between the battery, lamp, and switch.
- Switch: can be in on or off position.
- Reflector: plastic coated with a reflective aluminum layer to help brighten the effective light of the bulb.
- Bulb: usually very small.
- Lens: plastic cover in front of the bulb to protect the lamp which could easily be broken.
- Batteries: Provide power to the flashlight.
When the switch is in the “on” position, it connects the two contract strips which allow electrons to flow. The batteries provide power to the flashlight, and sit on top of a small spring that is connected to one of the contact strips. This contact strip runs along the length of the case and contacts the switch. Another contact strip connects the switch with the bulb. Finally, another contact connects the bulb to the top battery, completing the circuit.
- Battery: A device that can store electricity.
- Circuit: A complete path around which electricity can flow.
- Constraints: Limitations with material, time, size of team, etc.
- Criteria: Conditions that the design must satisfy like its overall size, etc.
- Electron Flow: Electricity.
- Engineers: Inventors and problem-solvers of the world. Twenty-five major specialties are recognized in engineering (see infographic).
- Engineering Design Process: Process engineers use to solve problems.
- Engineering Habits of Mind (EHM): Six unique ways that engineers think.
- Iteration: Test & redesign is one iteration. Repeat (multiple iterations).
- Prototype: A working model of the solution to be tested.
- Schematic Diagram: Diagram showing the electronic symbols of a circuit.
- Simple circuit: Consists of three minimum elements that are required to complete a functioning electric circuit: a source of electricity (battery), a path or conductor on which electricity flows (wire) and an electrical resistor (lamp) which is any device that requires electricity to operate.
- Switch: A device for making, breaking, or changing the connections in an electrical circuit.
Internet Connections
Recommended Reading
- DK Eyewitness Series: Electricity (ISBN: 0751361321)
- Eyewitness Electricity, by Steve Parker (DK Publishing, ISBN: 0789455773)
- How Science Works, by Judith Hann (Readers Digest, ISBN: 0762102497)
- The Usborne Book of Batteries & Magnets (How to Make Series), by Paula Borton, Vicky Cave (E D C Publications, ISBN: 074602083X)
Writing Activity
Write an essay or a paragraph describing how crank flashlights operate
Alignment to Curriculum Frameworks
Note: Lesson plans in this series are aligned to one or more of the following sets of standards:
- U.S. Science Education Standards (http://www.nap.edu/catalog.php?record_id=4962)
- U.S. Next Generation Science Standards (http://www.nextgenscience.org/)
- International Technology Education Association’s Standards for Technological Literacy (http://www.iteea.org/TAA/PDFs/xstnd.pdf)
- U.S. National Council of Teachers of Mathematics’ Principles and Standards for School Mathematics (http://www.nctm.org/standards/content.aspx?id=16909)
- U.S. Common Core State Standards for Mathematics (http://www.corestandards.org/Math)
- Computer Science Teachers Association K-12 Computer Science Standards (http://csta.acm.org/Curriculum/sub/K12Standards.html)
National Science Education Standards Grades K-4 (ages 4 – 9)
CONTENT STANDARD A: Science as Inquiry
As a result of activities, all students should develop
- Abilities necessary to do scientific inquiry
- Understanding about scientific inquiry
CONTENT STANDARD B: Physical Science
As a result of the activities, all students should develop an understanding of
- Light, heat, electricity, and magnetism
CONTENT STANDARD E: Science and Technology
As a result of activities, all students should develop
- Understanding about science and technology
National Science Education Standards Grades 5-8 (ages 10 – 14)
CONTENT STANDARD A: Science as Inquiry
As a result of activities, all students should develop
- Abilities necessary to do scientific inquiry
- Understandings about scientific inquiry
CONTENT STANDARD B: Physical Science
As a result of their activities, all students should develop an understanding of
- Transfer of energy
CONTENT STANDARD E: Science and Technology
As a result of activities, all students should develop
- Understandings about science and technology
Next Generation Science Standards – Grades 3-5 (Ages 8-11)
Students who demonstrate understanding can:
- 4-PS3-4. Apply scientific ideas to design, test, and refine a device that converts energy from one form to another.
Standards for Technological Literacy – All Ages
Design
- Standard 8: Students will develop an understanding of the attributes of design.
- Standard 9: Students will develop an understanding of engineering design.
- Standard 10: Students will develop an understanding of the role of troubleshooting, research and development, invention and innovation, and experimentation in problem solving.

 Industrial Engineering
 Computer Engineering
Draw a schematic diagram of the circuit design for the standard flashlight in the “on” position in the box below.
|
|
Draw the schematic diagram for your improved flashlight in the box below.
|
|
Downloadable Student Certificate of Completion