Spring Scale Engineering
This lesson focuses on the engineering behind building a spring scale and its use as a measuring device. Students work in teams to design, build, and test their own spring scale that can measure the weight of an apple using everyday items.
- Learn about scales and measuring devices.
- Learn about engineering design and redesign.
- Learn about construction techniques
- Learn about teamwork and problem solving.
Age Levels: 8-18
Build Materials
Classroom Materials:
- Set of identical items to be weighed (golf ball, tennis ball, cup of matching coins, or weights from a classroom weight set)
Student Team Materials:
- Spring (can be as simple as a slinky, or a spring ordered from a scientific supply company)
- Selection of the following items (not all are required):
- Cardboard
- Wooden dowels
- Tape
- Foil
- Construction paper
- Glue
- Markers
- String
- Rubber bands
- Wire
- Popsicle sticks
- Paper cups
- Straws
- Pipe cleaners
- Paper clips
- Screen
- Small plastic or PVC piping
Materials
- Set of identical items to be weighed (golf ball, tennis ball, cup of matching coins, or weights from a classroom weight set
Materials
- Set of identical items to be weighed (golf ball, tennis ball, cup of matching coins, or weights from a classroom weight set)
Process
Teams should test their scale by weighing several different items at least two times each and recording their results on the student worksheet. For each item, record the mass of the item, the starting position of the spring based on your scale before the item to be weighed, and the ending position of the spring (after it is stretched).
Test each team’s spring scale using the same item, to determine how close the scale comes to an accurate weight measurement. The goal is for the student scales to be accurate within 10% of the actual weight.
Design Challenge
You are part of a team of engineers given the challenge of building a spring scale to measure the weight of some items your teacher will provide you.
Criteria
- Must have a way of calibrating the scale so it will show a weight
- Scale must measure the weight of the items provided within 10% of the actual weight
Constraints
- Use only the materials provided
- May trade unlimited materials with other teams or request additional materials
- Break class into teams of 2-4.
- Hand out the Spring Scale Engineering worksheet, as well as some sheets of paper for sketching designs.
- Discuss the topics in the Background Concepts Section. To introduce the lesson, discuss with students examples of situations when measuring or weighing something doesn’t need to be extremely accurate. Mention a farmer’s market where goods are sold in bulk and rounding up or throwing in an extra apple may be commonplace, compared to the precise measurements required for medicine disbursement.
- Review the Engineering Design Process, Design Challenge, Criteria, Constraints and Materials.
- Provide each team with their materials.
- Explain that students must develop a spring scale that has a way of being calibrated to show a weight. The scale must measure the weight of the items provided within 10% of the actual weight. They’ll want to see if their scale can distinguish between one golf ball and two, or one onion and two for example.
- Announce the amount of time they have to design and build (1 hour recommended).
- Use a timer or an on-line stopwatch (count down feature) to ensure you keep on time. (www.online-stopwatch.com/full-screen-stopwatch). Give students regular “time checks” so they stay on task. If they are struggling, ask questions that will lead them to a solution quicker.
- Students meet and develop a plan for their spring scale. They agree on materials they will need, write/draw their plan, and present their plan to the class. Teams may trade unlimited materials with other teams to develop their ideal parts list.
- Teams build their designs.
- Teams should test their scale by weighing several different items at least two times each and recording their results on the student worksheet. For each item, record the mass of the item, the starting position of the spring based on your scale before the item to be weighed, and the ending position of the spring (after it is stretched).
Test the spring scale designs using the same item, to determine how close the scale comes to an accurate weight measurement. The goal is for the student scales to be accurate within 10% of the actual weight.
- As a class, discuss the student reflection questions.
- For more content on the topic, see the “Digging Deeper” section.
Student Reflection (engineering notebook)
- Was your scale able to measure the items provided by your teacher within 10% of the actual weight? If not, how close was your scale and how did it compare with the results of other teams?
- How similar was your original design to the actual scale you built?
- If you found you needed to make changes during the construction phase, describe why your team decided to make revisions.
- Which scale in your class came the closest to the actual weight of the items provided by your teacher? Was there something about the design of that scale or materials used that caused it to work the best? Explain…
- Do you think that this activity was more rewarding to do as a team, or would you have preferred to work alone on it? Why?
- If you could have used one additional material (tape, glue, wood sticks, foil — as examples) which would you choose and why?
- Do you think your scale would have been able to measure a weight of 600 grams? Why or why not?
- What real world applications can you think of for a scale that is reasonably accurate but not absolutely accurate?
- Do you think that real engineers redesign their systems and products over and over during planning and manufacturing? Why or why not?
Time Modification
The lesson can be done in as little as 1 class period for older students. However, to help students from feeling rushed and to ensure student success (especially for younger students), split the lesson into two periods giving students more time to brainstorm, test ideas and finalize their design. Conduct the testing and debrief in the next class period.
Spring Scales
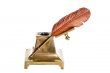
What is a Spring Scale?
A spring scale measures weight by the distance a spring deflects under a load. The first spring balance in Britain was made around 1770 by Richard Salter of West Bromwich. He and his nephews John & George founded the firm of George Salter & Company which is manufacturing scales and balances, and in 1838 patented the spring balance.
Very simply, a spring scale is a spring fixed at one end for stability and with a hook or something to hold the weight of an object (such as an apple) at the other. A measuring system will determine how far the spring stretches under the weight of the item. It is not designed for perfect accuracy, but rather to give a weight that does not require perfect accuracy. It works by Hooke’s Law, which states that the force needed to extend a spring is proportional to the distance that spring is extended from its rest position. So, markings on a spring scale are equally spaced.
Most spring scales are marked “Not Legal for Trade” in large letters because the accuracy is really an approximation. Also, the spring in a spring scale can permanently stretch with repeated use and so will become even less accurate over time.
A scale that you might find in a fruit market or the vegetable section of a grocery store is a good example of a spring scale. It does not give you a very precise measurement but rather a ball park estimate so the purchaser can see if they have selected roughly a pound of apples for example. Likely at the register there is a more accurate scale for charging customers an accurate fee. But, at a farmers market, a charge may be based on the spring scale’s estimate.
Scale Calibration and Hooke’s Law
All scales must be calibrated or marked so that when a weight is added the scale will display the weight of the object. Hooke’s law of elasticity is used to calibrate scales. It says that the extension of a spring (how much it expands when a weight pulls it down) is in direct proportion with the weight added to it as long as this load does not exceed the elastic limit. The elastic limit is the point at which the spring is so stretched out that it cannot stretch any more. Actually, Hooke’s law applies to any material that expands when a weight is added and then goes back to its original size after a weight is removed. Rubber bands and some plastics work this way, as do many springs. Hooke’s law is named after the 17th century British physicist Robert Hooke. He first stated this law in 1676 as a Latin anagram, whose solution he published in 1678 as Ut tensio, sic vis, meaning, “As the extension, so the force.”
Internet Connections
Recommended Reading
- The Story of Measurement (ISBN: 978-0500513675)
- A Measure of Everything: An Illustrated Guide to the Science of Measurement (ISBN: 978-1554070893)
- A Measure of All Things: The Story of Man and Measurement (ISBN: 0312370261)
Writing Activity
Write an essay or a paragraph explaining examples of where precise measurement is important and where imprecise measurement is acceptable?
Alignment to Curriculum Frameworks
Note: Lesson plans in this series are aligned to one or more of the following sets of standards:
- S. Science Education Standards (http://www.nap.edu/catalog.php?record_id=4962)
- S. Next Generation Science Standards (http://www.nextgenscience.org/)
- International Technology Education Association’s Standards for Technological Literacy (http://www.iteea.org/TAA/PDFs/xstnd.pdf)
- S. National Council of Teachers of Mathematics’ Principles and Standards for School Mathematics (http://www.nctm.org/standards/content.aspx?id=16909)
- S. Common Core State Standards for Mathematics (http://www.corestandards.org/Math)
- Computer Science Teachers Association K-12 Computer Science Standards (http://csta.acm.org/Curriculum/sub/K12Standards.html)
National Science Education Standards Grades K-4 (ages 4-9)
CONTENT STANDARD A: Science as Inquiry
As a result of activities, all students should develop
- Abilities necessary to do scientific inquiry
CONTENT STANDARD B: Physical Science
As a result of the activities, all students should develop an understanding of
- Properties of objects and materials
- Position and motion of objects
CONTENT STANDARD E: Science and Technology
As a result of activities, all students should develop
- Abilities of technological design
- Understanding about science and technology
- Abilities to distinguish between natural objects and objects made by humans
CONTENT STANDARD F: Science in Personal and Social Perspectives
As a result of activities, all students should develop understanding of
- Science and technology in local challenges
CONTENT STANDARD G: History and Nature of Science
As a result of activities, all students should develop understanding of
- Science as a human endeavor
National Science Education Standards Grades 5-8 (ages 10-14)
CONTENT STANDARD A: Science as Inquiry
As a result of activities, all students should develop
- Abilities necessary to do scientific inquiry
- Understandings about scientific inquiry
CONTENT STANDARD B: Physical Science
As a result of their activities, all students should develop an understanding of
- Properties and changes of properties in matter
- Motions and forces
CONTENT STANDARD E: Science and Technology
As a result of activities in grades 5-8, all students should develop
- Abilities of technological design
- Understandings about science and technology
CONTENT STANDARD F: Science in Personal and Social Perspectives
As a result of activities, all students should develop understanding of
- Science and technology in society
National Science Education Standards Grades 5-8 (ages 10-14)
CONTENT STANDARD G: History and Nature of Science
As a result of activities, all students should develop understanding of
- Nature of science
- History of science
National Science Education Standards Grades 9-12 (ages 14-18)
CONTENT STANDARD A: Science as Inquiry
As a result of activities, all students should develop
- Abilities necessary to do scientific inquiry
- Understandings about scientific inquiry
CONTENT STANDARD B: Physical Science
As a result of their activities, all students should develop understanding of
- Motions and forces
CONTENT STANDARD E: Science and Technology
As a result of activities, all students should develop
- Abilities of technological design
- Understandings about science and technology
CONTENT STANDARD F: Science in Personal and Social Perspectives
As a result of activities, all students should develop understanding of
- Science and technology in local, national, and global challenges
CONTENT STANDARD G: History and Nature of Science
As a result of activities, all students should develop understanding of
- Historical perspectives
Next Generation Science Standards Grades 3-5 (Ages 8-11)
Motion and Stability: Forces and Interactions
Students who demonstrate understanding can:
- 3-PS2-1. Plan and conduct an investigation to provide evidence of the effects of balanced and unbalanced forces on the motion of an object.
Engineering Design
Students who demonstrate understanding can:
- 3-5-ETS1-1.Define a simple design problem reflecting a need or a want that includes specified criteria for success and constraints on materials, time, or cost.
- 3-5-ETS1-2.Generate and compare multiple possible solutions to a problem based on how well each is likely to meet the criteria and constraints of the problem.
- 3-5-ETS1-3.Plan and carry out fair tests in which variables are controlled and failure points are considered to identify aspects of a model or prototype that can be improved.
Next Generation Science Standards Grades 6-8 (Ages 11-14)
Motion and Stability: Forces and Interactions
- MS-PS2-2. Plan an investigation to provide evidence that the change in an object’s motion depends on the sum of the forces on the object and the mass of the object.
Engineering Design
Students who demonstrate understanding can:
- MS-ETS1-1 Define the criteria and constraints of a design problem with sufficient precision to ensure a successful solution, taking into account relevant scientific principles and potential impacts on people and the natural environment that may limit possible solutions.
- MS-ETS1-2 Evaluate competing design solutions using a systematic process to determine how well they meet the criteria and constraints of the problem.
Principles and Standards for School Mathematics (ages 6 – 18)
Number and Operations Standard
- Understand numbers, ways of representing numbers, relationships among numbers, and number systems
- Compute fluently and make reasonable estimates
Measurement Standard
- Understand measurable attributes of objects and the units, systems, and processes of measurement
- Apply appropriate techniques, tools, and formulas to determine measurements
Representation
- Create and use representations to organize, record, and communicate mathematical ideas
- Use representations to model and interpret physical, social, and mathematical phenomena
Common Core State Standards for School Mathematics Grades 2-8 (ages 7-14)
Measurement and Data
- Measure and estimate lengths in standard units.
- Math.Content.2.MD.A.1Measure the length of an object by selecting and using appropriate tools such as rulers, yardsticks, meter sticks, and measuring tapes.
- Math.Content.2.MD.A.3Estimate lengths using units of inches, feet, centimeters, and meters.
- Solve problems involving measurement and estimation.
- Math.Content.3.MD.A.2Measure and estimate liquid volumes and masses of objects using standard units of grams (g), kilograms (kg), and liters (l).1 Add, subtract, multiply, or divide to solve one-step word problems involving masses or volumes that are given in the same units, e.g., by using drawings (such as a beaker with a measurement scale) to represent the problem.2
Standards for Technological Literacy – All Ages
The Nature of Technology
- Standard 1: Students will develop an understanding of the characteristics and scope of technology.
- Standard 3: Students will develop an understanding of the relationships among technologies and the connections between technology and other fields of study.
Technology and Society
- Standard 4: Students will develop an understanding of the cultural, social, economic, and political effects of technology.
Design
- Standard 8: Students will develop an understanding of the attributes of design.
- Standard 9: Students will develop an understanding of engineering design.
- Standard 10: Students will develop an understanding of the role of troubleshooting, research and development, invention and innovation, and experimentation in problem solving.
Abilities for a Technological World
- Standard 11: Students will develop abilities to apply the design process.
The Designed World
Standard 17: Students will develop an understanding of and be able to select and use information and communication technologies.

 Industrial Engineering
 Computer Engineering
Engineering Teamwork and Planning
You are part of a team of engineers given the challenge of building a spring scale to measure the weight of some items your teacher will provide you. In addition to a spring, you’ll have lots of materials to use such as cardboard, wooden dowels, tape, foil, construction paper, glue, markers, string, rubber bands, wire, popsicle sticks, paper cups, straws, pipe cleaners, paper clips, screen, pvc piping, and other readily available materials.
Planning and Design Phase
You may structure your scale any way you like, but must have a way of calibrating the scale so it will show a weight to you for whatever items you have to weigh. You’ll want your scale to measure the weight of the items provided within 10% of the actual weight. You may want to test your scale with a range of items to make sure your scale works before classroom testing. In the box below, draw a diagram of your planned scale, and include a list of the parts you think you might need. You can adjust this later and also add more materials during construction.
|
|
| Materials List:
|
Construction Phase
Build your scale and be sure to test it with several different items. You’ll want to see if your scale can distinguish between one golf ball and two, or one onion and two for example. Make any adjustments during construction that you like, including asking for additional materials you might need. You can also trade materials with other student teams if they have extra items you need.
Classroom Testing
Test your scale by weighing several different items at least two times each and record your results in the box below. This will help you to test your scale.
For each item, record the mass of the item, the starting position of the spring based on your scale before you add the item to be weighted, and the ending position of the spring (after it is stretched).
| Item you weighed | Mass (grams) | Starting Position (cm) | Stretched Position (cm) | Stretch (cm) |
| Onion | ||||
| Ball | ||||
Evaluation
Complete the evaluation questions below:
- Was your scale able to measure the items provided by your teacher within 10% of the actual weight? If not, how close was your scale and how did it compare with the results of other teams?
- How similar was your original design to the actual scale you built?
- If you found you needed to make changes during the construction phase, describe why your team decided to make revisions.
- Which scale in your class came the closest to the actual weight of the items provided by your teacher? Was there something about the design of that scale or materials used that caused it to work the best? Explain…
- Do you think that this activity was more rewarding to do as a team, or would you have preferred to work alone on it? Why?
- If you could have used one additional material (tape, glue, wood sticks, foil — as examples) which would you choose and why?
- Do you think your scale would have been able to measure a weight of 600 grams? Why or why not?
- What real world applications can you think of for a scale that is reasonably accurate but not absolutely accurate?
- Do you think that real engineers redesign their systems and products over and over during planning and manufacturing? Why or why not?
Lesson Plan Translation
Downloadable Student Certificate of Completion