Get it Write
This lesson explores how pens have been engineered and re-engineered over time. Students work in teams to develop a working pen out of everyday materials.
- Learn about mechanical engineering.
- Learn about engineering design and redesign.
- Learn how engineering can help solve society’s challenges.
- Learn about teamwork and problem solving.
Age Levels: 8-18
Build Materials (For each team)
Required Materials
- Straws
- Paper
- String
- Wire
- Paper clips
- Feathers/quills
- Glue
- Aluminum foil
- Plastic wrap
- Leaves
- Wood craft sticks
Testing Materials
- Water
- Washable liquid watercolor or diluted washable paint
- Flour or cornstarch (used as a thickener)
- Sponge
Materials
- Water
- Washable liquid watercolor or diluted washable paint
- Flour or cornstarch (for use in managing the flow of ink)
- Sponge
Process
Teams test their writing instrument designs by writing the letter “A” clearly on a piece of paper. They must also demonstrate how they stop and start the flow of ink.
Design Challenge
You are part of a team of engineers given the challenge of developing a writing instrument out of everyday materials that can deliver a controlled flow of “ink.” You must be able to write the letter “A” clearly on a piece of paper with your instrument.
Criteria
- Must include a way to control the flow of “ink.”
- Must write a letter “A” clearly on paper.
Constraints
- Use only the materials provided.
- Teams may trade unlimited materials.
- Break class into teams of 3-4.
- Hand out the Get it Write worksheet, as well as some sheets of paper for sketching designs.
- Discuss the topics in the Background Concepts Section. Ask students to consider how the pen they might be using works. Ask them to identify several different types of pens, and consider how pens have changed over the years.
- Review the Engineering Design Process, Design Challenge, Criteria, Constraints and Materials.
- Provide each team with their materials.
- Explain that students must design and build a writing instrument. The instrument must deliver a controlled flow of “ink” and they must be able to write the letter “A” clearly on a piece of paper with their instrument.
- Announce the amount of time they have to design and build (1 hour recommended).
- Use a timer or an on-line stopwatch (count down feature) to ensure you keep on time. (www.online-stopwatch.com/full-screen-stopwatch). Give students regular “time checks” so they stay on task. If they are struggling, ask questions that will lead them to a solution quicker.
- Students meet and develop a plan for their writing instrument. They agree on materials they will need, write/draw their plan, and present their plan to the class. Teams may trade unlimited materials with other teams to develop their ideal parts list.
- Teams build their designs.
- Teams test their writing instrument designs by writing the letter “A” clearly on a piece of paper. They must also demonstrate how they stop and start the flow of ink.
- As a class, discuss the student reflection questions.
- For more content on the topic, see the “Digging Deeper” section.
Extension idea
Have students develop a writing instrument that can switch between two different colors of “ink.”
Student Reflection (engineering notebook)
- How similar was your original pen design to the actual pen your team built?
- If you found you needed to make changes during the construction phase, describe what happened that caused your design to adjust during manufacturing.
- Which pen engineered by another team was the most effective? What made this pen work the best?
- Do you think that this activity was more rewarding to do as a team, or would you have preferred to work alone on it? Why?
- If you could have used one additional material (tape, glue, wood sticks, foil — as examples) which would you choose and why?
- Did you change the viscosity of the fluid you used for your “ink?” If so, what did you do, and what impact do you think it had on how your team met the challenge?
- Do you think your team could get a patent for your pen design? Why? Why not?
Time Modification
The lesson can be done in as little as 1 class period for older students. However, to help students from feeling rushed and to ensure student success (especially for younger students), split the lesson into two periods giving students more time to brainstorm, test ideas and finalize their design. Conduct the testing and debrief in the next class period.
History of Writing Instruments

Writing through the Ages
Humans have developed and refined many different types of writing instruments over history, from simple scratches on stone walls, to elaborate paintings on caves, to ball point pens, permanent markers, and even pens that can operate without gravity in outer space and also under water.
Early Pens
The use of pens goes back very far in history! Many ancient people used bird feathers, bamboo sticks, reeds, and grasses to deliver colored liquids to surfaces such as birch bark and papyrus. Reed pens continued to be used until the Middle Ages but soon the use of quills became more popular. It is believed that quill pens were used to write some of the Dead Sea Scrolls, which date to about 100 BC. Quill pens were used to write and sign the Constitution of the United States in 1787. And, many people today still use quill pens for decorative writing.
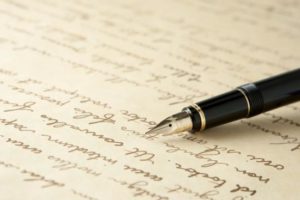
Reservoir Pens
But, pens that included a reservoir for holding ink have been identified back into the 10th century. It is said that in 953, Ma’ād al-Mu’izz, of Egypt requested a pen that would not stain his clothes or fingers. He was apparently provided with a design that held ink in a reservoir which provided ink to a metal nib. In 1636 a German inventor named Daniel Schwenter worked on a pen with two quills — one to hold the ink, and another to deliver ink to paper. A cork was used to seal the ink in the quill. Advances were made with the use of metal “nibs” that helped direct ink. A metal pen point was patented in 1803 but never really developed. In 1809, Bartholomew Folsch was granted an English patent for a pen that included an ink reservoir. A Parisian student named Romanian Petrache Poenaru was granted a patent by the French Government in May 1827 for the Fountain Pen. In 1867 M. Klein and Henry W. Wynne were granted a U.S. patent (#68445) for an ink chamber and delivery system that was all housed in the handle of a “fountain” pen.
Newer Designs
The design and functionality of pens continually is “re-engineered.” There are rollerball pens, felt tip pens, marker pens, erasable pens, and pens that work underwater and in zero gravity. Still, the older designs, such as fountain pens, are now considered a status symbol.
- Constraints: Limitations with material, time, size of team, etc.
- Criteria: Conditions that the design must satisfy like its overall size, etc.
- Engineers: Inventors and problem-solvers of the world. Twenty-five major specialties are recognized in engineering (see infographic).
- Engineering Design Process: Process engineers use to solve problems.
- Engineering Habits of Mind (EHM): Six unique ways that engineers think.
- Iteration: Test & redesign is one iteration. Repeat (multiple iterations).
- Mechanical engineering: The branch of engineering dealing with the design, construction, and use of machines.
- Patent: A patent for an invention is the grant of a property right to the inventor, issued by a
- country’s Patent and Trademark Office.
- Prototype: A working model of the solution to be tested.
- Viscosity: A measure of the resistance of a fluid. For fluids, viscosity can be thought of as the “thickness” or “internal friction” of the fluid.
Internet Connections
Recommended Reading
- The Story of Writing by Andrew Robinson (ISBN: 978-0500286609)
- The Incredible Ball Point Pen: A Comprehensive History (ISBN: 978-0764304378)
Writing Activity
Write an essay or a paragraph about how engineers have developed writing instruments that operate under water or in situations without gravity such as outer space.
Alignment to Curriculum Frameworks
Note: Lesson plans in this series are aligned to one or more of the following sets of standards:
- U.S. Science Education Standards (http://www.nap.edu/catalog.php?record_id=4962)
- U.S. Next Generation Science Standards (http://www.nextgenscience.org/)
- International Technology Education Association’s Standards for Technological Literacy (http://www.iteea.org/TAA/PDFs/xstnd.pdf)
- U.S. National Council of Teachers of Mathematics’ Principles and Standards for School Mathematics (http://www.nctm.org/standards/content.aspx?id=16909)
- U.S. Common Core State Standards for Mathematics (http://www.corestandards.org/Math)
- Computer Science Teachers Association K-12 Computer Science Standards (http://csta.acm.org/Curriculum/sub/K12Standards.html)
National Science Education Standards Grades K-4 (ages 4-9)
CONTENT STANDARD A: Science as Inquiry
As a result of activities, all students should develop
- Abilities necessary to do scientific inquiry
CONTENT STANDARD B: Physical Science
As a result of the activities, all students should develop an understanding of
- Properties of objects and materials
CONTENT STANDARD E: Science and Technology
As a result of activities, all students should develop
- Abilities of technological design
- Understanding about science and technology
CONTENT STANDARD F: Science in Personal and Social Perspectives
As a result of activities, all students should develop understanding of
- Science and technology in local challenges
CONTENT STANDARD G: History and Nature of Science
As a result of activities, all students should develop understanding of
- Science as a human endeavor
National Science Education Standards Grades 5-8 (ages 10-14)
CONTENT STANDARD A: Science as Inquiry
As a result of activities, all students should develop
- Abilities necessary to do scientific inquiry
CONTENT STANDARD B: Physical Science
As a result of their activities, all students should develop an understanding of
- Motions and forces
CONTENT STANDARD E: Science and Technology
As a result of activities in grades 5-8, all students should develop
- Abilities of technological design
- Understandings about science and technology
CONTENT STANDARD F: Science in Personal and Social Perspectives
As a result of activities, all students should develop understanding of
- Science and technology in society
CONTENT STANDARD G: History and Nature of Science
As a result of activities, all students should develop understanding of
- History of science
National Science Education Standards Grades 9-12 (ages 14-18)
CONTENT STANDARD A: Science as Inquiry
As a result of activities, all students should develop
- Abilities necessary to do scientific inquiry
CONTENT STANDARD B: Physical Science
As a result of their activities, all students should develop understanding of
- Motions and forces
CONTENT STANDARD E: Science and Technology
As a result of activities, all students should develop
- Abilities of technological design
- Understandings about science and technology
CONTENT STANDARD F: Science in Personal and Social Perspectives
As a result of activities, all students should develop understanding of
- Science and technology in local, national, and global challenges
CONTENT STANDARD G: History and Nature of Science
As a result of activities, all students should develop understanding of
- Science as a human endeavor
- Nature of scientific knowledge
- Historical perspectives
Next Generation Science Standards Grades 3-5 (Ages 8-11)
Engineering Design
Students who demonstrate understanding can:
- 3-5-ETS1-1.Define a simple design problem reflecting a need or a want that includes specified criteria for success and constraints on materials, time, or cost.
- 3-5-ETS1-2.Generate and compare multiple possible solutions to a problem based on how well each is likely to meet the criteria and constraints of the problem.
- 3-5-ETS1-3. Plan and carry out fair tests in which variables are controlled and failure points are considered to identify aspects of a model or prototype that can be improved.
Next Generation Science Standards Grades 6-8 (Ages 11-14)
Engineering Design
Students who demonstrate understanding can:
- MS-ETS1-2 Evaluate competing design solutions using a systematic process to determine how well they meet the criteria and constraints of the problem.
Standards for Technological Literacy – All Ages
The Nature of Technology
- Standard 1: Students will develop an understanding of the characteristics and scope of technology.
Technology and Society
- Standard 4: Students will develop an understanding of the cultural, social, economic, and political effects of technology.
- Standard 5: Students will develop an understanding of the effects of technology on the environment.
- Standard 6: Students will develop an understanding of the role of society in the development and use of technology.
- Standard 7: Students will develop an understanding of the influence of technology on history.
Design
- Standard 9: Students will develop an understanding of engineering design.
- Standard 10: Students will develop an understanding of the role of troubleshooting, research and development, invention and innovation, and experimentation in problem solving.
Abilities for a Technological World
- Standard 11: Students will develop abilities to apply the design process.
- Standard 13: Students will develop abilities to assess the impact of products and systems.
The Designed World
- Standard 17: Students will develop an understanding of and be able to select and use information and communication technologies.

 Industrial Engineering
 Computer Engineering
Engineering Teamwork and Planning
You are part of a team of engineers given the challenge of developing a writing instrument out of everyday materials that can deliver a controlled flow of ink (well, actually washable liquid water color). You’ll consider the challenge as a team, read about how different pen styles have been engineered over the years, and come up with your own design. Hint: you may need to engineer your “ink” as well, to change its viscosity.
Research Phase
Read the materials provided to you by your teacher. Consider how modern and older pen designs operate and think how you would develop your own working pen using the materials that have been provided to you.
Planning and Design Phase
In the space below or on a separate piece of paper, draw a detailed diagram showing the plan for your pen, including the materials you plan to use.
|
|
| Materials you will need:
|
Presentation Phase
Present your ideas, drawings, and plan for your pen to the class, and listen to the ideas the other teams have come up with.
Construction and Testing Phase
Build your pen, and test it. You may need to adjust your design during this phase to reach your goal. You may also trade or use materials that other teams do not need….or ask your teacher for additional supplies. You should be able to write the letter “A” clearly on a piece of paper with your instrument.
Reflection
Complete the reflection questions below and then share your experiences with the class:
- How similar was your original pen design to the actual pen your team built?
- If you found you needed to make changes during the construction phase, describe what happened that caused your design to adjust during manufacturing.
- Which pen engineered by another team made was the most effective? What made this pen work the best?
- Do you think that this activity was more rewarding to do as a team, or would you have preferred to work alone on it? Why?
- If you could have used one additional material (tape, glue, wood sticks, foil — as examples) which would you choose and why?
- Did you change the viscosity of the fluid you used for your “ink?” If so, what did you do, and what impact do you think it had on how your team met the challenge?
- Do you think your team could get a patent for you pen design? Why? Why not?
Lesson Plan Translation
[language-switcher]
Downloadable Student Certificate of Completion