Design a Dome
This lesson focuses on the engineering behind building framing for structures, and explores examples of geodesic domes and other buildings. Students work in teams to design and build a small dome frame out of everyday items that can hold a weight on top without collapsing.
- Learn about engineering design and redesign.
- Learn about construction techniques.
- Learn about teamwork and problem solving.
Age Levels: 8-18
Build Materials (For each team)
Optional Materials (Trading/Table of Possibilities)
- Cardboard
- Wooden dowels
- Aluminum Foil
- Construction paper
- Tissue paper
- String
- Rubber bands
- Wire or pipe cleaners
- Popsicle sticks
- Paper cups
- Plastic/Paper Straws
- Screen
- Fabric
Testing Materials
- Paper cup
- 120 grams of weight (coins, candy, legos, etc.)
Materials
- Paper cup
- 120 grams of weight (coins, candy, legos, etc./1 US Penny = 1 gram)
Process
Test by placing each team’s design on a table or desk. Place weight in a paper cup and place the cup on top of the dome design. Gradually add weight to the cup until the structure collapses or until 120 grams is reached (1 US Penny = 1 gram). Each team should document how much weight their dome could withstand.
Design Challenge
You are a team of engineers working together to design a dome structure with an internal frame and optional exterior decorations that is strong enough to support 120 grams of weight on top. Your structure must be at least 14 cm tall measured from the top of the dome to the bottom.
Criteria
- Dome must be at least 14cm tall measured front he top of the dome to the bottom
Constraints
- Use only the materials provided
- Break class into teams of 2-4.
- Hand out the Design a Dome worksheet, as well as some sheets of paper for sketching designs.
- Discuss the topics in the Background Concepts Section. Discuss the wide range of shapes and sizes of buildings and have the class consider the advantages or disadvantages of different shapes. Discuss the geodesic dome and have the group consider why domes can be a good shape choice for some projects and environments, examples are the South Pole dome and dome shaped camping tents. Have students consider the structure of a geodesic dome. The resources at www.bfi.org will give some insight into geodesic dome use and history.
- Review the Engineering Design Process, Design Challenge, Criteria, Constraints and Materials.
- Instruct students to start brainstorming and sketching their designs.
- Provide each team with their materials.
- Explain that students must develop a dome that is at least 14cm tall measured front he top of the dome to the bottom.
- Announce the amount of time they have to design and build (1 hour recommended).
- Use a timer or an on-line stopwatch (count down feature) to ensure you keep on time. (www.online-stopwatch.com/full-screen-stopwatch). Give students regular “time checks” so they stay on task. If they are struggling, ask questions that will lead them to a solution quicker.
- Students meet and develop a plan for their dome. They agree on materials they will need, write/draw their plan, and present their plan to the class. Teams may trade unlimited materials with other teams to develop their ideal parts list.
- Teams build their designs.
- Test by placing each team’s design on a table or desk. Place weight in a paper cup and place the cup on top of the dome design. Gradually add weight to the cup until the structure collapses or until 120 grams is reached (1 US Penny = 1 gram).
- Teams should document the weight their dome could withstand.
- As a class, discuss the student reflection questions.
- For more content on the topic, see the “Digging Deeper” section.
Student Reflection (engineering notebook)
- How similar was your original design to the actual dome you built?
- If you found you needed to make changes during the construction phase, describe why your team decided to make revisions.
- Which dome that another team made was the most interesting to you? Why?
- Do you think that this activity was more rewarding to do as a team, or would you have preferred to work alone on it? Why?
- If you could have used one additional material (tape, glue, wood sticks, foil — as examples) which would you choose and why?
- Do you think your dome would have been able to hold 600 grams of weight? Why or why not?
Time Modification
The lesson can be done in as little as 1 class period for older students. However, to help students from feeling rushed and to ensure student success (especially for younger students), split the lesson into two periods giving students more time to brainstorm, test ideas and finalize their design. Conduct the testing and debrief in the next class period.
Domes and Construction
The Geodesic Dome
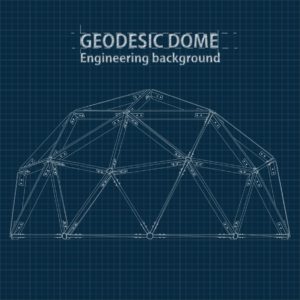
Many structures require framing to provide shape and strength before an outer shell is created. A good example is the geodesic dome. A geodesic dome is a spherical or partial-spherical shell structure or lattice shell based on a network of great circles (geodesics) lying on the surface of a sphere. The geodesics intersect to form triangular elements that have local triangular rigidity and also distribute the stress across the entire structure. Walther Bauersfeld was a German engineer, employed by the Zeiss Corporation, who, on a suggestion by the German astronomer Max Wolf, started work on the first projection planetarium during 1912. Bauersfeld completed the first planetarium, known as the Zeiss I model during 1923, which is considered the first geodesic dome derived from the icosahedron, more than 20 years before Buckminster Fuller reinvented and popularized this design. Although Fuller was not the original inventor, he developed the intrinsic mathematics of the dome, thereby allowing popularization of the idea — for which he received a U.S. patent in 1954. Spaceship Earth at Epcot, Walt Disney World, in Florida, USA is a geodesic sphere.
Uses of Domes

Geodesic domes have been used as the basis of many buildings and structures including collapsible camping tents. The National Science Foundation image to the right shows the deconstruction of a geodesic dome which for about three decades sheltered polar researchers and support crews who lived at the bottom of the world. The dome, spanning 164 feet and topping out at about 52 feet high, was dedicated in January 1975. It shielded a collection of buildings that housed scientists and support personnel year-round from wind and snow. The structure far outlived its projected expiration date
- Criteria: Conditions that the design must satisfy like its overall size, etc.
- Engineers: Inventors and problem-solvers of the world. Twenty-five major specialties are recognized in engineering (see infographic).
- Engineering Design Process: Process engineers use to solve problems.
- Engineering Habits of Mind (EHM): Six unique ways that engineers think.
- Geodesic Dome: A spherical or partial-spherical shell structure or lattice shell based on a network of great circles (geodesics) lying on the surface of a sphere.
- Iteration: Test & redesign is one iteration. Repeat (multiple iterations).
- Prototype: A working model of the solution to be tested[/vc_column_text]
Internet Connections
Recommended Reading
- Fuller Houses: R. Buckminster Fuller’s Dymaxion Dwellings and Other Domestic Adventures (ISBN: 978-3037781418)
- Ultimate Guide to House Framing (ISBN: 978-1580114431)
Writing Activity
Write an essay or a paragraph about why sturdy framing is so important to construction. How have the materials used for building framing changed as buildings have become taller and taller?
Alignment to Curriculum Frameworks
Note: Lesson plans in this series are aligned to one or more of the following sets of standards:
- U.S. Science Education Standards (http://www.nap.edu/catalog.php?record_id=4962)
- U.S. Next Generation Science Standards (http://www.nextgenscience.org/)
- International Technology Education Association’s Standards for Technological Literacy (http://www.iteea.org/TAA/PDFs/xstnd.pdf)
- U.S. National Council of Teachers of Mathematics’ Principles and Standards for School Mathematics (http://www.nctm.org/standards/content.aspx?id=16909)
- U.S. Common Core State Standards for Mathematics (http://www.corestandards.org/Math)
- Computer Science Teachers Association K-12 Computer Science Standards (http://csta.acm.org/Curriculum/sub/K12Standards.html)
National Science Education Standards Grades K-4 (ages 4-9)
CONTENT STANDARD A: Science as Inquiry
As a result of activities, all students should develop
- Abilities necessary to do scientific inquiry
- Understanding about scientific inquiry
CONTENT STANDARD B: Physical Science
As a result of the activities, all students should develop an understanding of
- Properties of objects and materials
CONTENT STANDARD E: Science and Technology
As a result of activities, all students should develop
- Abilities of technological design
- Abilities to distinguish between natural objects and objects made by humans
CONTENT STANDARD F: Science in Personal and Social Perspectives
As a result of activities, all students should develop understanding of
- Changes in environments
- Science and technology in local challenges
CONTENT STANDARD G: History and Nature of Science
As a result of activities, all students should develop understanding of
- Science as a human endeavor
National Science Education Standards Grades 5-8 (ages 10-14)
CONTENT STANDARD A: Science as Inquiry
As a result of activities, all students should develop
- Abilities necessary to do scientific inquiry
CONTENT STANDARD B: Physical Science
As a result of their activities, all students should develop an understanding of
- Motions and forces
CONTENT STANDARD E: Science and Technology
As a result of activities in grades 5-8, all students should develop
- Abilities of technological design
- Understandings about science and technology
CONTENT STANDARD F: Science in Personal and Social Perspectives
As a result of activities, all students should develop understanding of
- Science and technology in society
National Science Education Standards Grades 9-12 (ages 14-18)
CONTENT STANDARD A: Science as Inquiry
As a result of activities, all students should develop
- Understandings about scientific inquiry
CONTENT STANDARD B: Physical Science
As a result of their activities, all students should develop understanding of
- Motions and forces
CONTENT STANDARD E: Science and Technology
As a result of activities, all students should develop
- Abilities of technological design
- Understandings about science and technology
CONTENT STANDARD F: Science in Personal and Social Perspectives
As a result of activities, all students should develop understanding of
- Science and technology in local, national, and global challenges
CONTENT STANDARD G: History and Nature of Science
As a result of activities, all students should develop understanding of
- Science as a human endeavor
- Historical perspectives
Standards for Technological Literacy – All Ages
Technology and Society
- Standard 6: Students will develop an understanding of the role of society in the development and use of technology.
Design
- Standard 8: Students will develop an understanding of the attributes of design.
- Standard 9: Students will develop an understanding of engineering design.
- Standard 10: Students will develop an understanding of the role of troubleshooting, research and development, invention and innovation, and experimentation in problem solving.
Abilities for a Technological World
- Standard 11: Students will develop abilities to apply the design process.
The Designed World
- Standard 20: Students will develop an understanding of and be able to select and use construction technologies.

 Industrial Engineering
 Computer Engineering
Engineering Teamwork and Planning
You are part of a team of engineers given the challenge of building a dome to hold 120 grams of coins, candy, or other materials selected by your teacher. You’ll have lots of materials to use such as cardboard, wooden dowels, tape, foil, construction paper, tissue paper, glue, string, rubber bands, wire, popsicle sticks, paper cups, straws, pipe cleaners, paper clips, screen, and other readily available materials. Your structure must be at least 14 cm tall measured from the top of the dome to the bottom.
Planning and Design Phase
Think about the different ways you can use the materials provided to construct a dome structure. You may add a skin or shell out of different materials, or have the frame be the full product. On a separate piece of paper, draw a diagram of your planned dome, and in the box below, make a list of the parts you think you might need. You can adjust this later and also add more materials during construction.
| Materials Needed:
|
Construction Phase
Build your dome and make any adjustments during construction that you like, including asking for additional materials. You can also trade materials with other student teams if they have extra items you would like to incorporate.
Classroom Testing
Your teacher will place your team’s design on a table or desk. Next, they will place weight in a paper cup and place the cup on top of the dome design. Then, they will gradually add weight to the cup until the structure collapses or until 120 grams is reached (1 US Penny = 1 gram).
Evaluation
Complete the evaluation questions below:
1. How similar was your original design to the actual dome you built?
2. If you found you needed to make changes during the construction phase, describe why your team decided to make revisions.
3. Which dome that another team made was the most interesting to you? Why?
4. Do you think that this activity was more rewarding to do as a team, or would you have preferred to work alone on it? Why?
5. If you could have used one additional material (tape, glue, wood sticks, foil — as examples) which would you choose and why?
6. Do you think your dome would have been able to hold 600 grams of weight? Why or why not?
Downloadable Student Certificate of Completion